[Lesson 26] << [CONTENTS] >> [Lesson 28]
In this lesson, we shall show you how to use the timer in Visual Basic 2012. The timer is used to control and manage events that are time-related. For example, you need the timer to create a clock, a stopwatch, a dice, animation and more.
In order to create a clock, you need to use the Timer control.It is invisible during runtime and it does not allow the user to interact with it.
27.1 Creating a Clock
To create the clock, first of all, start a new project in Visual Basic 2012 Express and select a new Windows Application. You can give the project any name it MyClock. Change the caption of the Form1 to MyClock in the properties window. Now add the Timer control to the form by dragging it from the ToolBox. Next, insert a label control into the form. Change the Font size of the label to 14 and set the text alignment to center. Set the Interval property of the Timer control to 1000, which reflects a one-second interval(1 unit is 1 millisecond).
Now, you are ready for the coding. Actually, you would be surprised that what you need to create a clock is only a one-line code, that is:
Label1.Text = TimeOfDay
To actually create the clock, click on the Timer control and insert the code above, as shown below:
Private Sub Timer1_Tick(ByVal sender As System.Object, ByVal e As System.EventArgs) Handles Timer1.Tick
 Label1.Text = TimeOfDay
End Sub
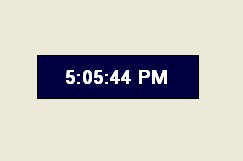
The Clock is shown below:
27.2 Creating a Stopwatch
We can create a simple stopwatch using the Timer control. Start a new project and name it stopwatch. Change the Form1 caption to Stopwatch. Insert the Timer control into the form and set its interval to 1000 which is equal to one second. Also, set the timer Enabled property to False so that it will not start ticking when the program is started. Insert three command buttons and change their names to StartBtn, StopBtn and ResetBtn respectively. Change their text to “Start”, “Stop” and “Reset” accordingly. Now, key in the code as follows:
Private Sub Timer1_Tick(ByVal sender As System.Object, ByVal e As System.EventArgs) Handles Timer1.Tick
'To increase one unit per second
 Label1.Text = Val(Label1.Text) + 1
End Sub

Private Sub StopBtn_Click(ByVal sender As System.Object, ByVal e As System.EventArgs) Handles StopBtn.Click
'To stop the Timer
 Timer1.Enabled = False
End Sub

Private Sub StartBtn_Click(ByVal sender As System.Object, ByVal e As System.EventArgs) Handles StartBtn.Click
'To start the Timer
 Timer1.Enabled = True
End Sub

Private Sub ResetBtn_Click(ByVal sender As System.Object, ByVal e As System.EventArgs) Handles ResetBtn.Click
'To reset the Timer to 0
 Label1.Text = 0
End Sub
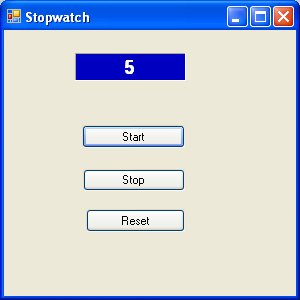
The Interface of the Stopwatch is as shown below:
27.3 Creating a Digital Dice
We can create a digital dice easily using the Timer Control. To create a dice, you need to generate random numbers using the Rnd function. Rnd generates numbers between 0 and 1. The statement
n = Int(1 + Rnd() * 6)
generates integers from 1 to 6 randomly.
In the code, we introduce the variable m to control the length of time of the rolling process. If m is more than 1000, then the rolling process will stop by setting the timer enabled property to False.
The code is shown below:
Public Class Form1
Dim n, m As Integer
Private Sub Timer1_Tick(ByVal sender As System.Object, ByVal e As System.EventArgs) Handles Timer1.Tick
 m = m + 10
If m < 1000 Then
 n = Int(1 + Rnd() * 6)
 LblDice.Text = n
Else
 Timer1.Enabled = False
 m = 0
End If
End Sub

Private Sub RollDiceBtn_Click(ByVal sender As System.Object, ByVal e As System.EventArgs) Handles RollDiceBtn.Click
 Timer1.Enabled = True
End Sub
End Class
Running the program produces a dice with fast-changing numbers which stop at a certain number. The interface is shown below:
