
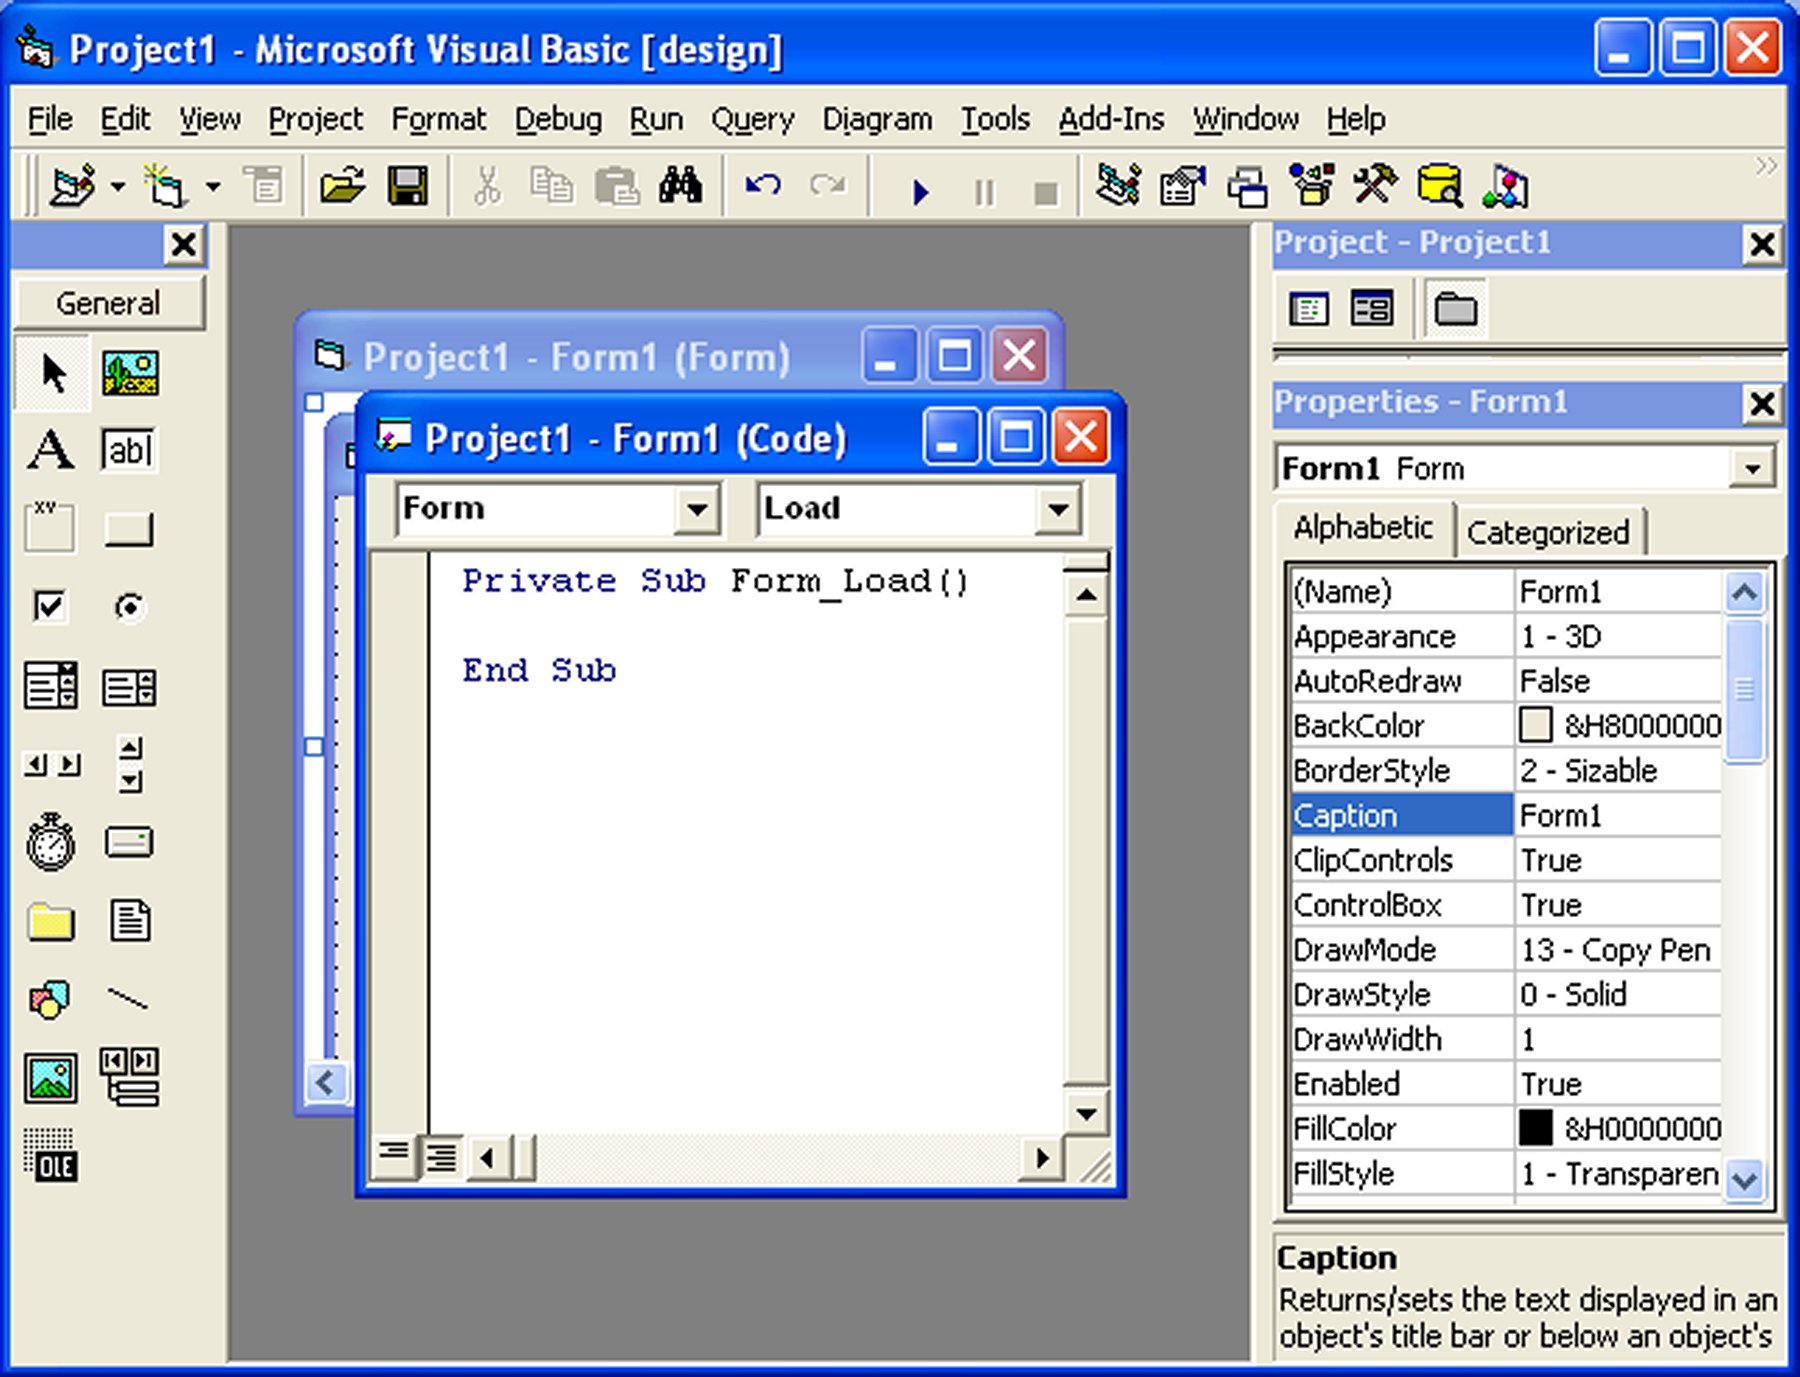
First of all, launch Microsoft Visual Basic 6 compiler that you have installed earlier. In the New Project Dialog , choose Standard EXE to enter Visual Basic 6 integrated development environment. In the VB6 IDE, a default form with the name Form1 will appear. Next, double click on Form1 to bring up the source code window for Form1, as shown in Figure 2.1.
The top of the source code window consists of a list of objects and their associated events or procedures. In the source code window, the object displayed is Form1 and the associated procedure is Load.
When you click on the object box,
the drop-down list will display a list of objects you have inserted into your
form, as shown in figure 2.2. Here, you can see a form with the name Form1, a command button with the
name Command1, a Label with the name Label1 and a Picture Box with the name
Picture1.


You do not have to worry about the beginning and the end statements (i.e. Private Sub Form_Load.......End Sub.); Just key in the lines in between the above two statements exactly as are shown here. When you press F5 to run the program, you will be surprised that nothing showed up .In order to display the output of the program, you have to add the Form1.show statement like in Example 2.1.1 or you can just use Form_Activate ( ) event procedure as shown in example 2.1.2. The command Print does not mean printing using a printer but it means displaying the output on the computer screen. Now, press F5 or click on the run button to run the program and you will get the output as shown in Figure 2.4.
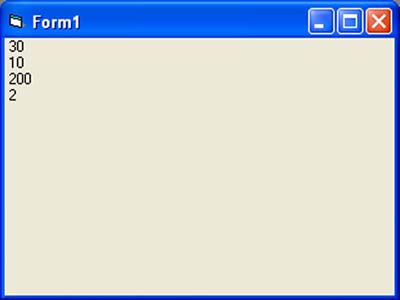
You can also perform arithmetic calculations as shown in Example 2.1.2. VB uses * to denote the multiplication operator and / to denote the division operator. The output is shown in Figure 2.5, where the results are arranged vertically.
Private Sub Form_Load ( )
Form1.show
Print "Welcome to Visual Basic tutorial"
End Sub
Private Sub Form_Activate ( )
Print 20 + 10
Print 20 - 10
Print 20 * 10
Print 20 / 10
End Sub

You can also use the + or the & operator to join two or more texts (string) together like in example 2.1.4 (a) and (b)
Private Sub
A = "Tom"
B = "likes"
C = "to"
D = "eat"
E = "burger"
Print A + B + C + D + E
End Sub
Private Sub
A = "Tom"
B = "likes"
C = "to"
D = "eat"
E = "burger"
Print A & B & C & D & E
End Sub
The
Output of Example 2.1.4(a) &(b) is as shown in Figure 2.7.

Step 1: Design the interface by adding controls to the form and set their properties
Step 2:Write code for the event procedures
In this example, we want to show you how to write code to change the background and the foreground color randomly. We will place two command buttons and a label on the form. One of the command buttons will be used to change the background color while the other one will be used to change the foreground color. The Label is for displaying the foreground color. There are two events here, change background color and change foreground color. Therefore, we need to write code for the two event procedures.
To make the program more interesting, we will use the Rnd() function, the Int() function and the RGB codes to change the color randomly. The Rnd() function creates a random number between 0 and 1 and the RGB code uses a combination of three integers to form a certain color. The Int() is a function that converts a number into an integer by truncating its decimal part and the resulting integer is the largest integer that is smaller than the number. For example, Int(0.2)=0, Int(2.4)=2, Int(4.8)=4. Therefore, Int(Rnd()*256) returns the smallest integer 0 and the biggest integer 255. The format of RGB code is RGB(a,b,c), where a, b, c range from 0 to 255. For example, RGB(255,0,0) is red, RGB(255,255,255) is white and (0,0,0) is black. Do not worry about the jargons, you will learn them in later lesson.
Now, rename the controls as follows:
Next, change the caption of the Label to "Please Change My Color". In addition, change the caption of Command1 button to "Change Background Color" and change the caption of Command2 button to "Change Foreground Color"
Now, enter the following code
Private Sub cmd_bgColor_Click()
 Dim r, g, b As Integer
 r = Int(Rnd() * 256)
 g = Int(Rnd() * 256)
 b = Int(Rnd() * 256)
 MyForm.BackColor = RGB(r, g, b)
End Sub

Private Sub Cmd_fgColor_Click()
 Dim r, g, b As Integer
 r = Int(Rnd() * 256)
 g = Int(Rnd() * 256)
 b = Int(Rnd() * 256)
 Lbl_Msg.ForeColor = RGB(r, g, b)
End Sub
When you run the program, each time you press on the 'Change Background Color' button, you will see different background color. Similarly, each time you press on the 'Change Foreground Color', you will see the message on the Label changes color. The output is shown in Figure 2.8.

Copyright©2008 Dr.Liew Voon Kiong. All rights reserved |Contact|Privacy Policy