
Visual Basic provides the capability to effectively manage databases created with various database programs, including MS Access, Oracle, MySQL, and more. In this lesson, our focus is not on database file creation, but rather on accessing database files within the VB environment. To illustrate this concept, we will develop a straightforward database application that allows users to browse customer names. In the following example, we will create a simple database application which enables one to browse customers' names. To create this application, select the data control on the toolbox(as shown in Figure 23.1) and insert it into the new form. Place the data control somewhere at the bottom of the form. Name the data control as data_navigator. To be able to use the data control, we need to connect it to any database. We can create a database file using any database application but I suggest we use the database files that come with VB6. Let's select NWIND.MDB as our database file.

To connect the data control to this database, double-click the DatabaseName property in the Properties window and then click on the button with three dots on the right(as shown in Figure 23.2) to open a file selection dialog as shown in Figure 23.3. From the dialog, search the folders of your hard drive to locate the database file NWIND.MDB. It is usually placed under Microsoft Visual Studio\VB98\ folder, Select the aforementioned file and now your data control is connected to this database file.


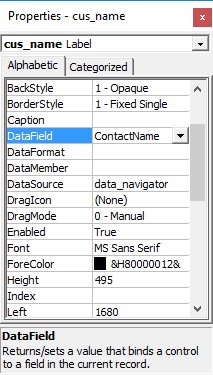
The next step is to double-click on the RecordSource property to select the customers table from the database file NWIND.MDB, as shown in Figure 23.4. You can also change the caption of the data control to anything, we use Click to browse Customers. After that, we will place a label and change its caption to Customer Name. In addition, insert another label and name it as cus_name and leave the label empty as customers' names will appear here when we click the arrows on the data control. We need to bind this label to the data control for the application to work. To do this, open the label's DataSource and select data_navigator that will appear automatically. One more thing that we need to do is to bind the label to the correct field so that data in this field will appear on this label. To do this, open the DataField property and select ContactName, as shown in Figure 23.5.

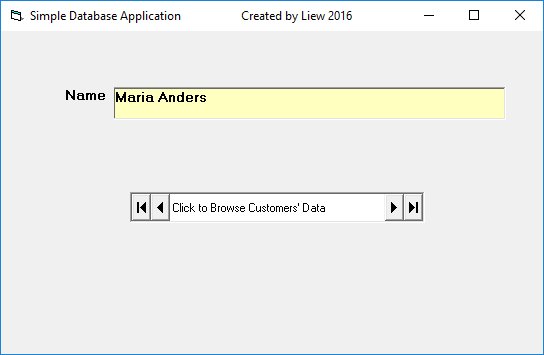
Now, press F5 and run the program. You should be able to browse all the customers' names by clicking the arrows on the data control, as hown in Figure 23.7.

You can also add other fields using exactly the same method. For example, you can add title, company, adress, City, postcode ,telephone number and more to the database browser. Besides, you can design a more professional interface, as shown in Figure 23.8.

Copyright©2008 Dr.Liew Voon Kiong. All rights reserved |Contact|Privacy Policy