In this lesson, we shall enhance the interface by adding controls to the form. Controls are objects that consist of three elements, namely properties, methods, and events.They can be added to the form from the Toolbox.
Among the controls, the most common ones are the button, label, text box, list box, combo box, picture box, checkbox, radio and more.The controls can be made visible or invisible at runtime. However, some controls will only run in the background and invisible at runtime, one such control is the timer.Adding controls to the form is an easy task, what you need to do is drag a control from the toolbox and drop it onto the form or draw it on the form. You can drag the control around the form and you can also resize it easily.
3.1 The Toolbox
The Toolbox is usually is hidden when you start Visual Basic 2017, you can click View on the menu bar and then select Toolbox to reveal the toolbox. You can also use shortcut keys Ctrl+Alt+x to bring out the toolbox. You can drag and dock the Toolbox around the IDE. It is docked at the right as shown in Figure 3.1.
 Figure 3.1: Visual Basic 2015 IDE Toolbox
You can change the position of the toolbox by dragging it to anywhere you like while its status is set to float. You can also dock the toolbox by right-clicking on the toolbox and choose dock from the pop-up menu. The docked toolbox that appears as tabbed document with the default form is as shown in Figure 3.2.
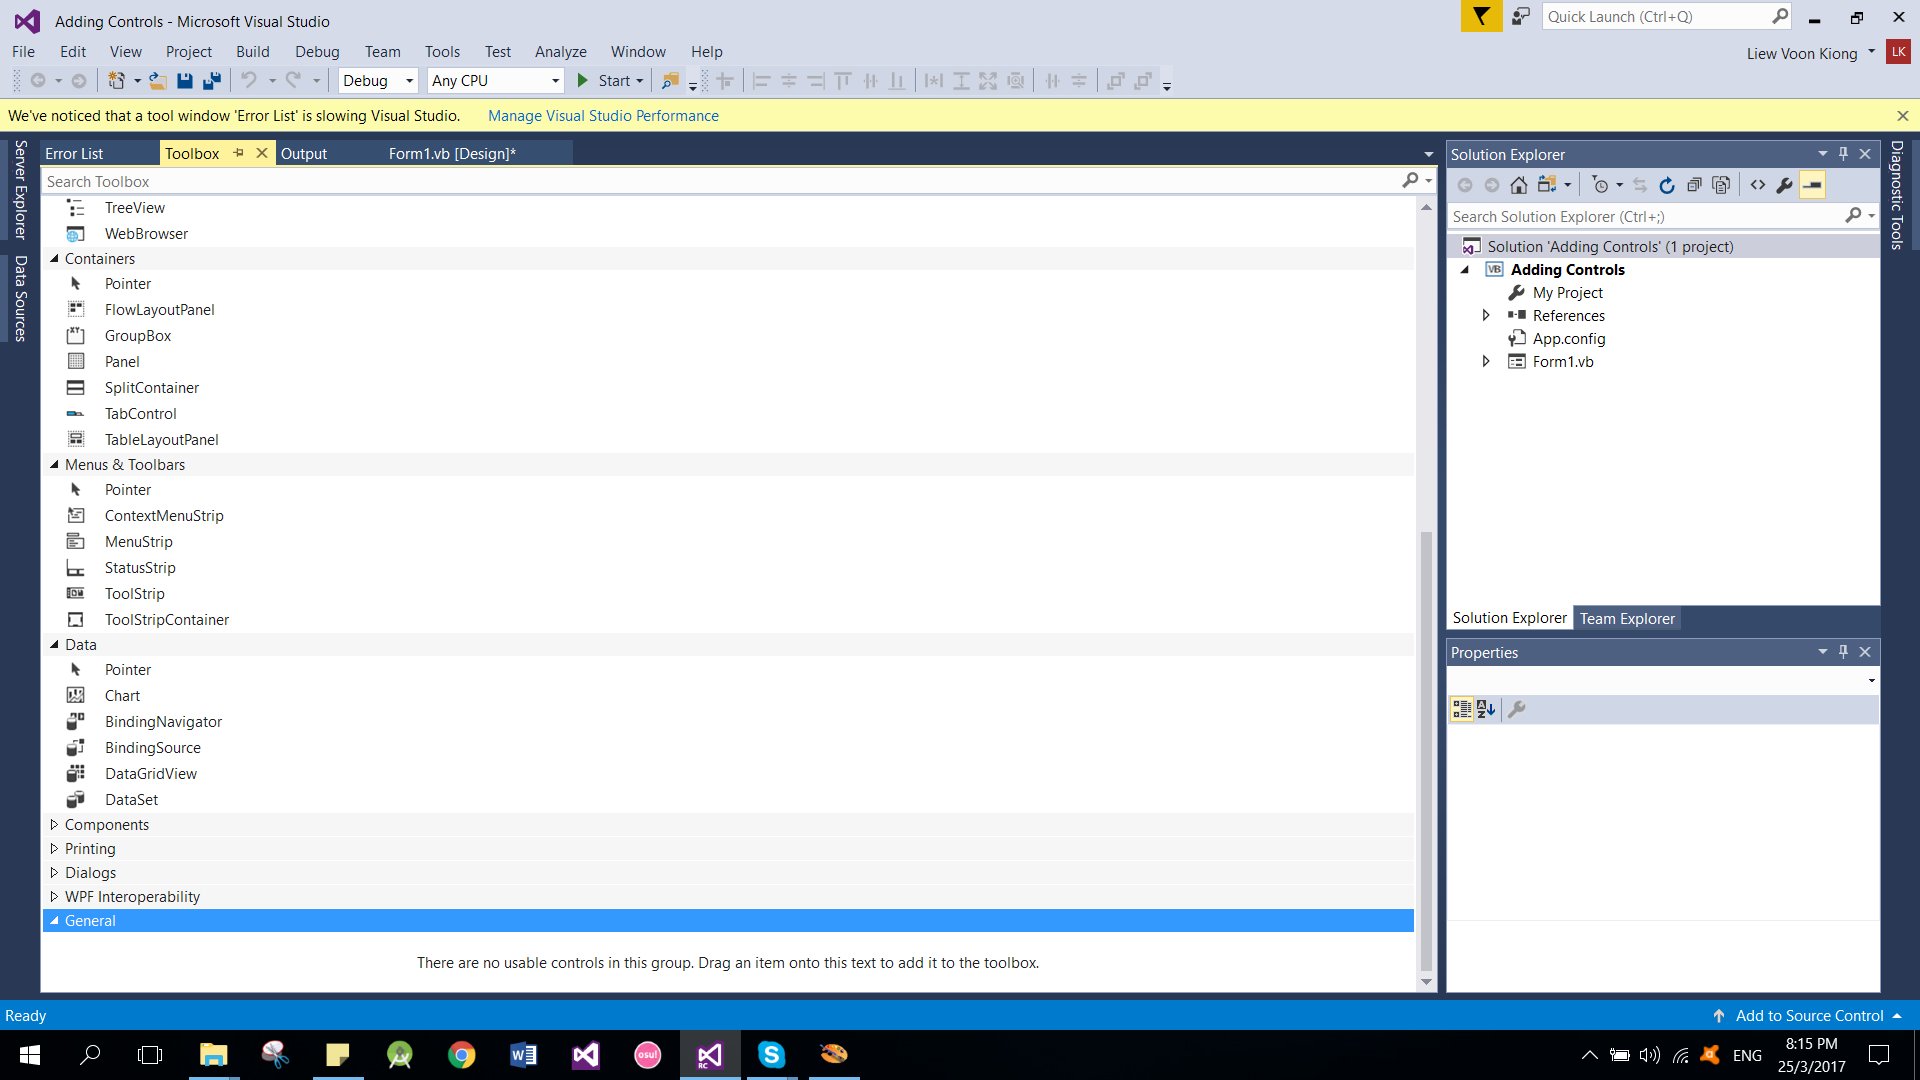 Figure 3.2: Toolbox appears as tabbed document
Further, you may also pin the toolbox to the sidebar or the bottom bar by clicking on the pin icon on the menu bar of the toolbox.
How and where you want to position your toolbox in Visual Basic 2017 IDE is entirely up to you but I strongly suggest that you place the toolbox alongside or at the bottom of the default form so that it is easy for you to add controls from the toolbox into the form. You should never cover the form with the toolbox because it will be difficult to add controls to the form.
3.2 Adding Controls to the Form and Changing Their Properties
To demonstrate how to add controls and then change their properties, we shall design a picture viewer. First, change the title of the default form to Picture Viewer in its properties window. Next, insert a picture box on the form and change its background color to white. To do this, right-click the picture box and select properties in the popup menu, then look for the BackColor Property in the Properties window. Next, add two buttons to the form and change the text to View and Close in their respective properties windows. Now, we have designed a basic picture viewer using Visual Basic 2017. We shall add more features later.
The picture viewer is not functional until we write code to respond to events triggered by the user. We will deal with the programming part in the coming lessons.
The design interface is as shown in Figure 3.3
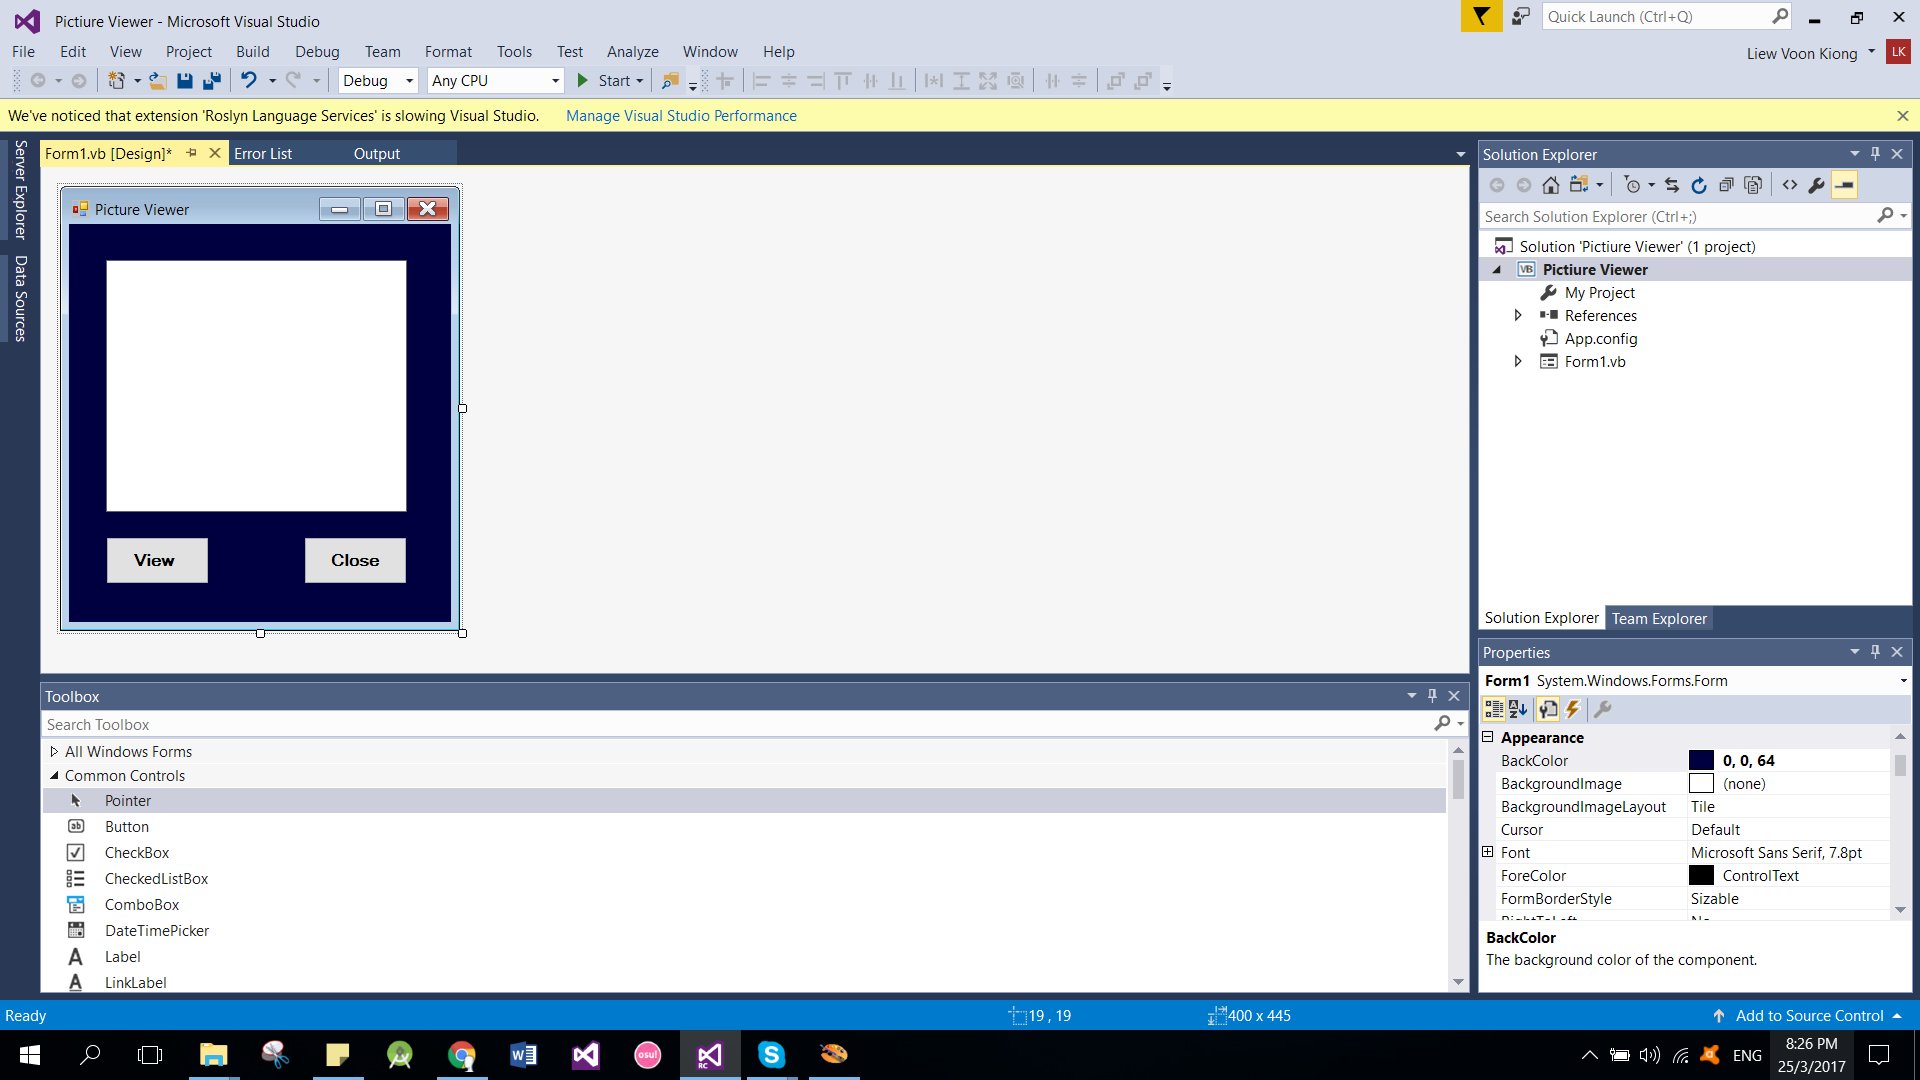 Figure 3.3: The Design Interface

 Figure 3.1: Visual Basic 2015 IDE Toolbox
You can change the position of the toolbox by dragging it to anywhere you like while its status is set to float. You can also dock the toolbox by right-clicking on the toolbox and choose dock from the pop-up menu. The docked toolbox that appears as tabbed document with the default form is as shown in Figure 3.2.
Figure 3.1: Visual Basic 2015 IDE Toolbox
You can change the position of the toolbox by dragging it to anywhere you like while its status is set to float. You can also dock the toolbox by right-clicking on the toolbox and choose dock from the pop-up menu. The docked toolbox that appears as tabbed document with the default form is as shown in Figure 3.2.
 Figure 3.2: Toolbox appears as tabbed document
Further, you may also pin the toolbox to the sidebar or the bottom bar by clicking on the pin icon on the menu bar of the toolbox.
How and where you want to position your toolbox in Visual Basic 2017 IDE is entirely up to you but I strongly suggest that you place the toolbox alongside or at the bottom of the default form so that it is easy for you to add controls from the toolbox into the form. You should never cover the form with the toolbox because it will be difficult to add controls to the form.
Figure 3.2: Toolbox appears as tabbed document
Further, you may also pin the toolbox to the sidebar or the bottom bar by clicking on the pin icon on the menu bar of the toolbox.
How and where you want to position your toolbox in Visual Basic 2017 IDE is entirely up to you but I strongly suggest that you place the toolbox alongside or at the bottom of the default form so that it is easy for you to add controls from the toolbox into the form. You should never cover the form with the toolbox because it will be difficult to add controls to the form.
 Figure 3.3: The Design Interface