Lesson 31: Creating Drag Drop Animation in VB6
Learn drag-and-drop techniques and complete motion animations using image controls and VB6 properties
Lesson Overview
Key Takeaway
VB6 enables creating engaging drag-and-drop animations and complete motion cycles using DragMode properties and visibility toggling techniques.
Welcome to Lesson 31 of our Visual Basic 6 Tutorial! In this lesson, you'll learn advanced animation techniques including drag-and-drop functionality and creating complete motion animations with multiple frames.
31.1 Animation using a DragDrop Procedure
Drag and drop is a common feature in Windows applications where you can drag an object such as a file into a folder or recycle bin. This application can be easily programmed in Visual Basic.
1Setup Images
Insert six images: a recycle bin, a burning recycle bin, a fire, and three draggable objects
2Configure Properties
Set DragMode=1 (Automatic) for draggable objects and set burning recycle bin Visible=False
3Tag Identification
Label the fire image with Tag="fire" to identify it in code

Essential Event Procedure
Private Sub Image4_DragDrop(Source As Control, X As Single, Y As Single)
    Source.Visible = False ' Hide the dragged object
    If Source.Tag = "Fire" Then ' Check if fire is dropped
        Image4.Picture = Image5.Picture ' Change to burning recycle bin
    End If
End Sub
Explanation
The Source parameter refers to the image being dragged. Setting Source.Visible=False makes it disappear after being dropped. If the source is fire (identified by its Tag property), the recycle bin image changes to show a burning effect.
Drag-and-Drop Demo
Try dragging the objects into the recycle bin:


Drag items over the recycle bin to see the effect
For the complete program, see our sample code: A Drag and Drop Recycle Bin.
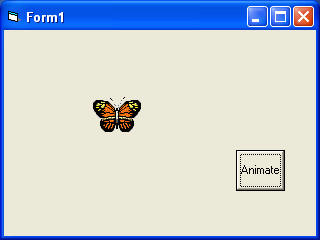
31.2 Animation for Complete Motion
Create true animations where an action completes a full cycle, such as a butterfly flapping its wings. This technique uses multiple picture frames displayed in sequence.


1Image Setup
Place all eight butterfly images overlapping on the form
2Initial Visibility
Set Image1 Visible=True, others Visible=False at startup
3Animation Control
Use a command button to cycle through the images

Code Implementation
Private Sub Command1_Click()
    If Image1.Visible = True Then
        Image1.Visible = False
        Image2.Visible = True
    ElseIf Image2.Visible = True Then
        Image2.Visible = False
        Image3.Visible = True
    '... (other frames similarly)
    ElseIf Image8.Visible = True Then
        Image8.Visible = False
        Image1.Visible = True
    End If
End Sub
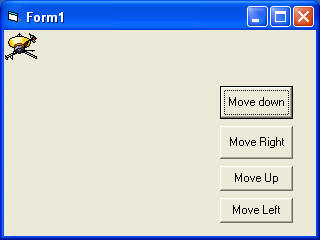
Combining Movement with Animation
You can create the effect of the butterfly flapping its wings while flying by combining position changes with the animation:
Sub move_up()
    If Image1.Visible = True Then
        Image1.Visible = False
        Image2.Visible = True
        Image2.Top = Image2.Top - 100 ' Move up
    ElseIf Image2.Visible = True Then
        Image2.Visible = False
        Image3.Visible = True
        Image3.Top = Image3.Top - 100 ' Move up
    '... (other frames similarly)
    ElseIf Image8.Visible = True Then
        Image8.Visible = False
        Image1.Visible = True
        Image1.Top = Image1.Top - 100 ' Move up
    End If
End Sub
Lesson Summary
In this lesson, you've learned advanced animation techniques in VB6:
Drag-and-Drop Animation
Create interactive animations using DragMode and DragDrop events
Complete Motion Animation
Sequence multiple frames to create fluid animations
Combined Movement
Animate objects while changing their position for realistic effects
Tag Identification
Use Tag property to identify specific objects in code
Important Note
For smoother animations, consider using a Timer control to automate frame changes instead of relying on button clicks.
Next Lesson
Continue your VB6 journey with Lesson 32: Animation Techniques Part 3.
Related Resources

Visual Basic 6 Made Easy
Start your programming journey with Visual Basic 6. Learn how to build Windows applications step-by-step using an easy and beginner-friendly approach.
- Perfect for beginners
- Learn core programming concepts
- Build real VB6 applications

Visual Basic 2026 Made Easy
Upgrade to modern Visual Basic with VB.NET, .NET 10, and Visual Studio 2026. Build real-world applications with modern tools and AI-powered development.
- Modern VB.NET development
- Hands-on projects and real apps
- GitHub Copilot & AI integration
🚀 Ready for the Next Level?
After learning the basics with VB6 Made Easy and upgrading to VB2026 Made Easy, continue your journey into advanced professional development.

Advanced VB.NET Programming
Take your VB.NET skills to the next level. Learn advanced programming techniques, real-world architectures, and professional development practices using modern .NET.
Best For:
- After VB6 or VB.NET fundamentals
- Intermediate to advanced learners
- Developers building real-world systems
🚀 Migrating from VB6 to VB.NET
Still using or learning classic Visual Basic 6? This practical step-by-step guide shows you how to migrate legacy VB6 applications to modern VB.NET with Visual Studio 2026 and .NET 10.

VB6 to Modern VB.NET Made Easy
A practical step-by-step guide to migrating legacy Visual Basic 6 applications to VB.NET with Visual Studio 2026 and .NET 10.
- Designed for VB6 programmers and legacy app maintainers
- Clear migration guidance from classic VB to modern .NET
- Perfect bridge between VB6 fundamentals and VB.NET development
🚀 Move to Modern VB.NET
Visual Basic 6 is your foundation — but modern development uses VB.NET with .NET and Visual Studio 2026.
Start VB.NET Tutorial →