Lesson 36: Compiling & Distributing VB Applications
Package and distribute your VB6 applications professionally
Lesson Overview
Key Takeaway
Proper compilation and distribution ensure your VB6 applications run smoothly on users' machines without requiring the VB development environment.
Welcome to Lesson 36 of our Visual Basic 6 Tutorial! In this lesson, you'll learn how to compile your VB6 applications into standalone executables and create professional installation packages for distribution.
36.1 Compiling Your Visual Basic Program
Once you've completed and tested your VB program, you can compile it to run as a standalone Windows application without needing the Visual Basic IDE. Before compiling:
Debug Thoroughly
Ensure your program is error-free before compiling
Create EXE
Generate a standalone executable file
Protect Code
Compiled code cannot be modified or debugged
Compilation Steps:
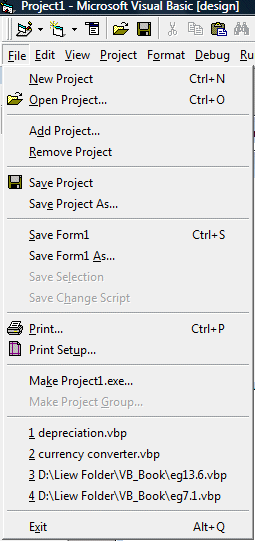
1 Access the Compile Menu
Click on File and select Make Project1.exe to begin the compilation process.
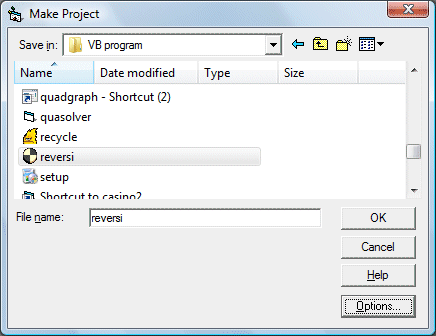
2 Configure Output
In the Make Project dialog, assign a filename and select a save location for your executable.
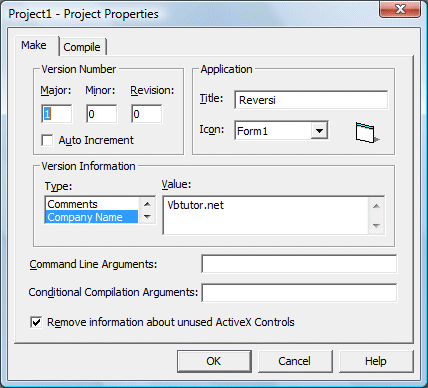
3 Set Project Properties
Customize your program details including title, version, and company name.
4 Choose Compilation Type
Select Native Code for best performance and click OK to compile.

Important
Always choose Native Code compilation for optimal performance. Once compiled, you cannot debug the application - you must debug in the IDE before compiling.
36.2 Distributing Your Programs
After compiling your application, you'll need to create a professional distribution package for users to install your program on their computers. VB6 includes the Package and Deployment Wizard to create installation packages for CD/DVD or online distribution.
Distribution Steps:
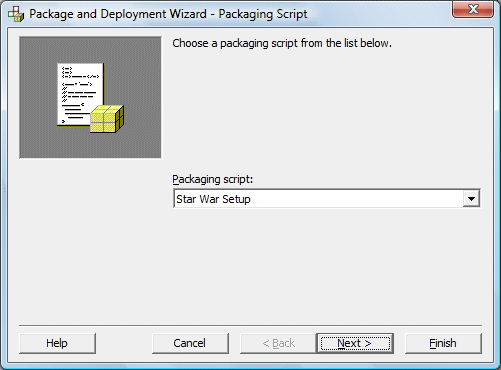
1 Launch the Wizard
Start the Package and Deployment Wizard from the Visual Basic tools menu.
2 Select Project
Choose the VB project you want to package for distribution.
3 Choose Packaging Type
Select Standard Setup Package for typical installations.
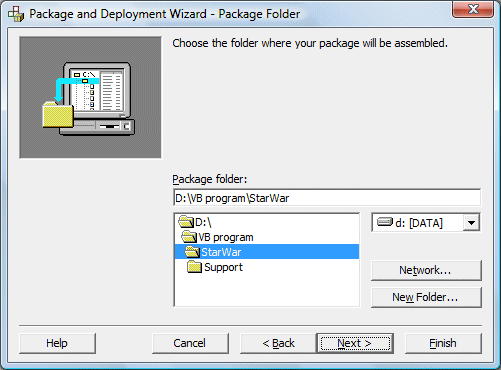
4 Configure Package
Set the package destination folder and include all required files.


Best Practice
The Package and Deployment Wizard automatically includes all necessary runtime files and dependencies. Always test your installation package on a clean machine to ensure all dependencies are included.
Sample Distribution Files
StarWar Program Files
Download these sample distribution files to see a complete installation package:
To install: Download all three files into the same folder and run setup.exe
Lesson Summary
In this lesson, you've learned the complete process for compiling and distributing VB6 applications:
Compilation Process
Convert your VB project into a standalone executable file
Distribution Packaging
Create professional installation packages for end users
Package Wizard
Use VB6's built-in tool to create complete installation packages
Testing & Validation
Ensure your application installs and runs correctly on target systems
Pro Tip
Always test your installation package on a clean Windows installation to ensure you've included all necessary dependencies and runtime files.
Next Lesson
Continue your VB6 journey with Lesson 37: Creating Professional Menus.
Related Resources

Visual Basic 6 Made Easy
Start your programming journey with Visual Basic 6. Learn how to build Windows applications step-by-step using an easy and beginner-friendly approach.
- Perfect for beginners
- Learn core programming concepts
- Build real VB6 applications

Visual Basic 2026 Made Easy
Upgrade to modern Visual Basic with VB.NET, .NET 10, and Visual Studio 2026. Build real-world applications with modern tools and AI-powered development.
- Modern VB.NET development
- Hands-on projects and real apps
- GitHub Copilot & AI integration
🚀 Ready for the Next Level?
After learning the basics with VB6 Made Easy and upgrading to VB2026 Made Easy, continue your journey into advanced professional development.

Advanced VB.NET Programming
Take your VB.NET skills to the next level. Learn advanced programming techniques, real-world architectures, and professional development practices using modern .NET.
Best For:
- After VB6 or VB.NET fundamentals
- Intermediate to advanced learners
- Developers building real-world systems
🚀 Migrating from VB6 to VB.NET
Still using or learning classic Visual Basic 6? This practical step-by-step guide shows you how to migrate legacy VB6 applications to modern VB.NET with Visual Studio 2026 and .NET 10.

VB6 to Modern VB.NET Made Easy
A practical step-by-step guide to migrating legacy Visual Basic 6 applications to VB.NET with Visual Studio 2026 and .NET 10.
- Designed for VB6 programmers and legacy app maintainers
- Clear migration guidance from classic VB to modern .NET
- Perfect bridge between VB6 fundamentals and VB.NET development
🚀 Move to Modern VB.NET
Visual Basic 6 is your foundation — but modern development uses VB.NET with .NET and Visual Studio 2026.
Start VB.NET Tutorial →