Lesson 32: Creating Animation using Timer in VB6
Learn to create automatic animations using Timer control for smooth, continuous motion effects
Key Takeaway
VB6 Timer control enables creating automatic animations by triggering events at regular intervals, allowing for smooth and continuous motion effects.
Welcome to Lesson 32 of our Visual Basic 6 Tutorial! In this lesson, you'll learn how to create automatic animations using the Timer control, which allows you to create smooth and continuous motion effects without manual interaction.
32.1 Animation using Timer Control
All preceding examples of animation you've learned required manual interaction (clicking buttons or pressing keys). To create automatic animations, you need to use the Timer control. The Timer triggers events at regular intervals, allowing you to update your animation frames automatically.
1Timer Setup
Drag a Timer control from the toolbox onto your form and set its Interval property
2Interval Value
Set interval in milliseconds (1000ms = 1 second). Lower values create faster animations
3Timer Event
Write your animation code in the Timer's Timer event to execute at each interval
Simple Two-Frame Animation
This example shows a dinosaur and a dog alternating automatically using a Timer:

Private Sub Timer1_Timer()
    If Image1.Visible = True Then
        Image1.Visible = False
        Image2.Visible = True
    ElseIf Image2.Visible = True Then
        Image2.Visible = False
        Image1.Visible = True
    End If
End Sub
Explanation
The Timer event alternates between two images by toggling their Visible property. The Timer's Interval property determines how frequently this toggle happens.
Complete Motion Animation
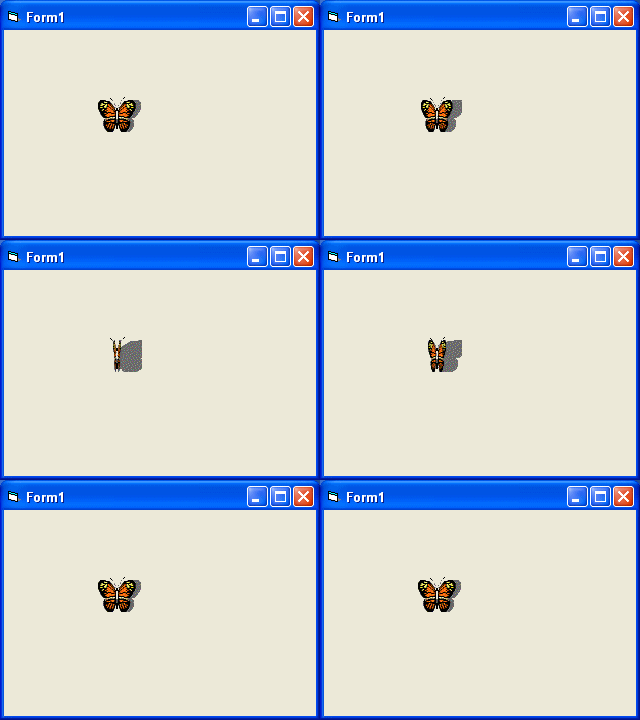
For more complex animations like a butterfly flapping its wings, use a Timer to cycle through multiple frames:

Private Sub Form_Load()
    Image1.Visible = True
    Timer1.Enabled = False ' Disabled until button click
End Sub

Private Sub Command1_Click()
    Timer1.Enabled = True ' Start animation
End Sub

Private Sub Timer1_Timer()
    If Image1.Visible = True Then
        Image1.Visible = False
        Image2.Visible = True
    ElseIf Image2.Visible = True Then
        Image2.Visible = False
        Image3.Visible = True
    '... (other frames similarly)
    ElseIf Image8.Visible = True Then
        Image8.Visible = False
        Image1.Visible = True
    End If
End Sub
Timer Animation Demo
This demo simulates the Timer control in action. Adjust the interval to control animation speed:

Important Note
For smoother animations, use a Timer with a low interval value (50-100ms) and ensure all frames are preloaded and positioned correctly.
Lesson Summary
In this lesson, you've learned how to create automatic animations in VB6 using the Timer control:
Timer Fundamentals
Use the Timer control to trigger events at regular intervals
Interval Control
Adjust the Interval property to control animation speed
Frame Cycling
Cycle through multiple frames in the Timer event for complex animations
Start/Stop Control
Enable/disable the Timer to start and stop animations programmatically
Pro Tip
For even smoother animations, consider using the Windows API for high-resolution timing, especially for games or complex animations.
Next Lesson
Continue your VB6 journey with Lesson 33: Creating a Web Browser Application.
Related Resources

Visual Basic 6 Made Easy
The comprehensive guide to mastering VB6 development, including advanced animation techniques with Timer control.
What You'll Learn:
- Timer control fundamentals
- Automatic animation techniques
- Frame-based animation optimization
- Game development with VB6
- Performance tuning for animations

Visual Basic 2022 Made Easy
The modern guide to VB.NET programming with Visual Studio 2022. Master modern animation techniques with timers.
What You'll Learn:
- Modern timer-based animations
- WPF animation techniques
- Game development with VB.NET
- Performance optimization
- Professional UI animations


